Take Your Salesforce User Experience to the Next Level. Create Salesforce Apps 10x faster. - 60+ Flow Screen Components - 30+ Experience Cloud Components - Free up to 10 users
Avonni Components passed Salesforce's security review and is on the AppExchange
Take Your Salesforce User Experience to the Next Level. Create Salesforce Apps 10x faster. - 60+ Flow Screen Components - 30+ Experience Cloud Components - Free up to 10 users
Avonni Components passed Salesforce's security review and is on the AppExchange
How to use Reactive components in your flow using the Avonni Flow Screen Components?
The Summer ’23 release brings an exciting new feature for Salesforce Flow Builder – Reactive Components. This innovative feature promises to transform screen building for Flow and the Salesforce platform as a whole.
Reactive screens were introduced at TrailblazerDX, showcasing the power of reactive screen components in action. Historically, screen flows have relied on the "Next" button to provide visual feedback on a component on the screen, leading to user friction. Whenever "Next" is clicked, all user input is sent to Salesforce Server’s for processing and then returned to the client browser. This server-side dependence can lead to errors, flow abandonment, and decision fatigue, particularly in long-form application scenarios.
With Reactive Components, all components on a screen know what's happening with other components on the same screen. This shift from server-side to client-side behavior allows you to create larger, more tailored screens without frequently needing the "Next" button. Imagine consolidating multiple screens into one – simplifying your Flow canvas and enhancing the user's experience when running the flow.
The Avonni Flow Screen Components library is already packed with reactive-ready components and harnesses this evolution, empowering developers and non-developers to create dynamic and interactive screens within Salesforce.
Benefits of Reactive Components:
Enhanced User Experience: Reactive Components enable non-developers to create single-page app-like experiences, reducing the number of screens users need to navigate.
Increased Flexibility: Previously, components on the same screen couldn't communicate. With Reactive Components, you can now configure components to react to changes in other components on the same screen, opening up a world of possibilities for customization and flexibility.
Simplified Development Process: Reactive Components make building complex interactions between components easier, simplifying the overall development process and reducing development time.
Use Case Example: Updating Avonni Carousel Images Based on Color Selection
In this example, we will create a Reactive Component that instantly updates the Avonni Carousel images based on the color selected using the Avonni Visual Picker component. This will allow users to preview a car in their chosen color.
Step 1: Install the Avonni Flow Screen Components library and activate screen components
Make sure to install the Avonni Flow Screen Components library in your Salesforce org. If you still need to install it, you can find it in the Salesforce AppExchange.
In the Salesforce Flow Builder, create a new Flow and add a Screen element to the canvas.
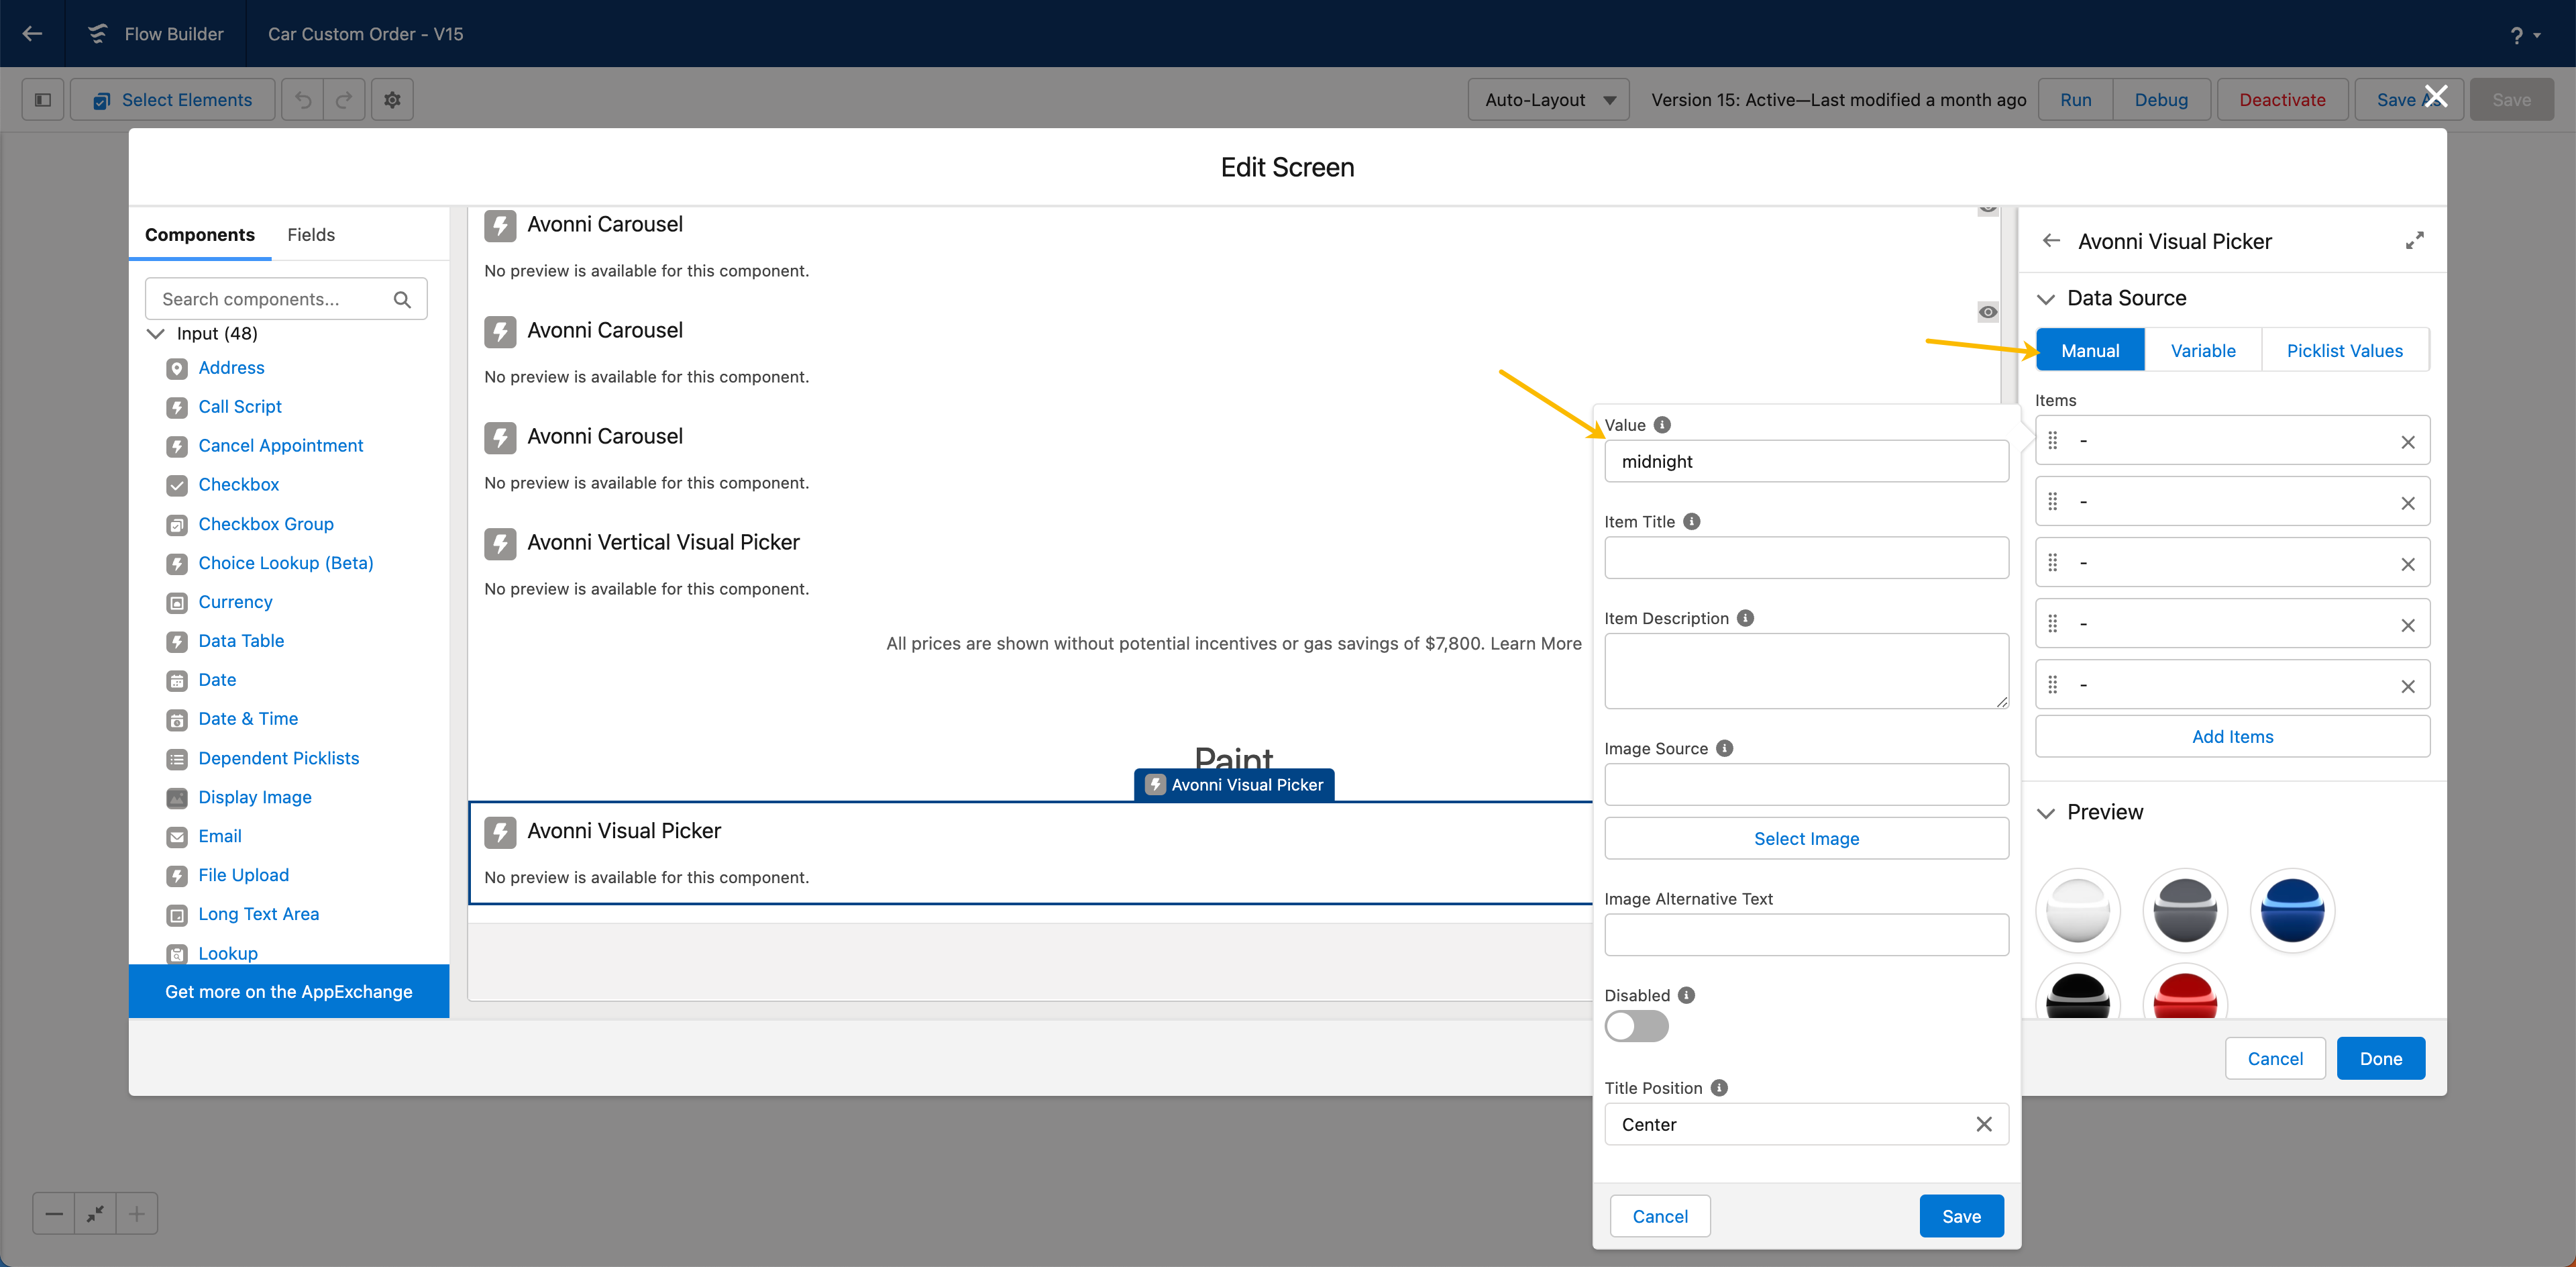
Step 3: Add the Avonni Visual Picker Component
Drag and drop the Avonni Visual Picker component onto the Screen element. Configure the Visual Picker component to display the available car colors as a manual data source.
One item by color.
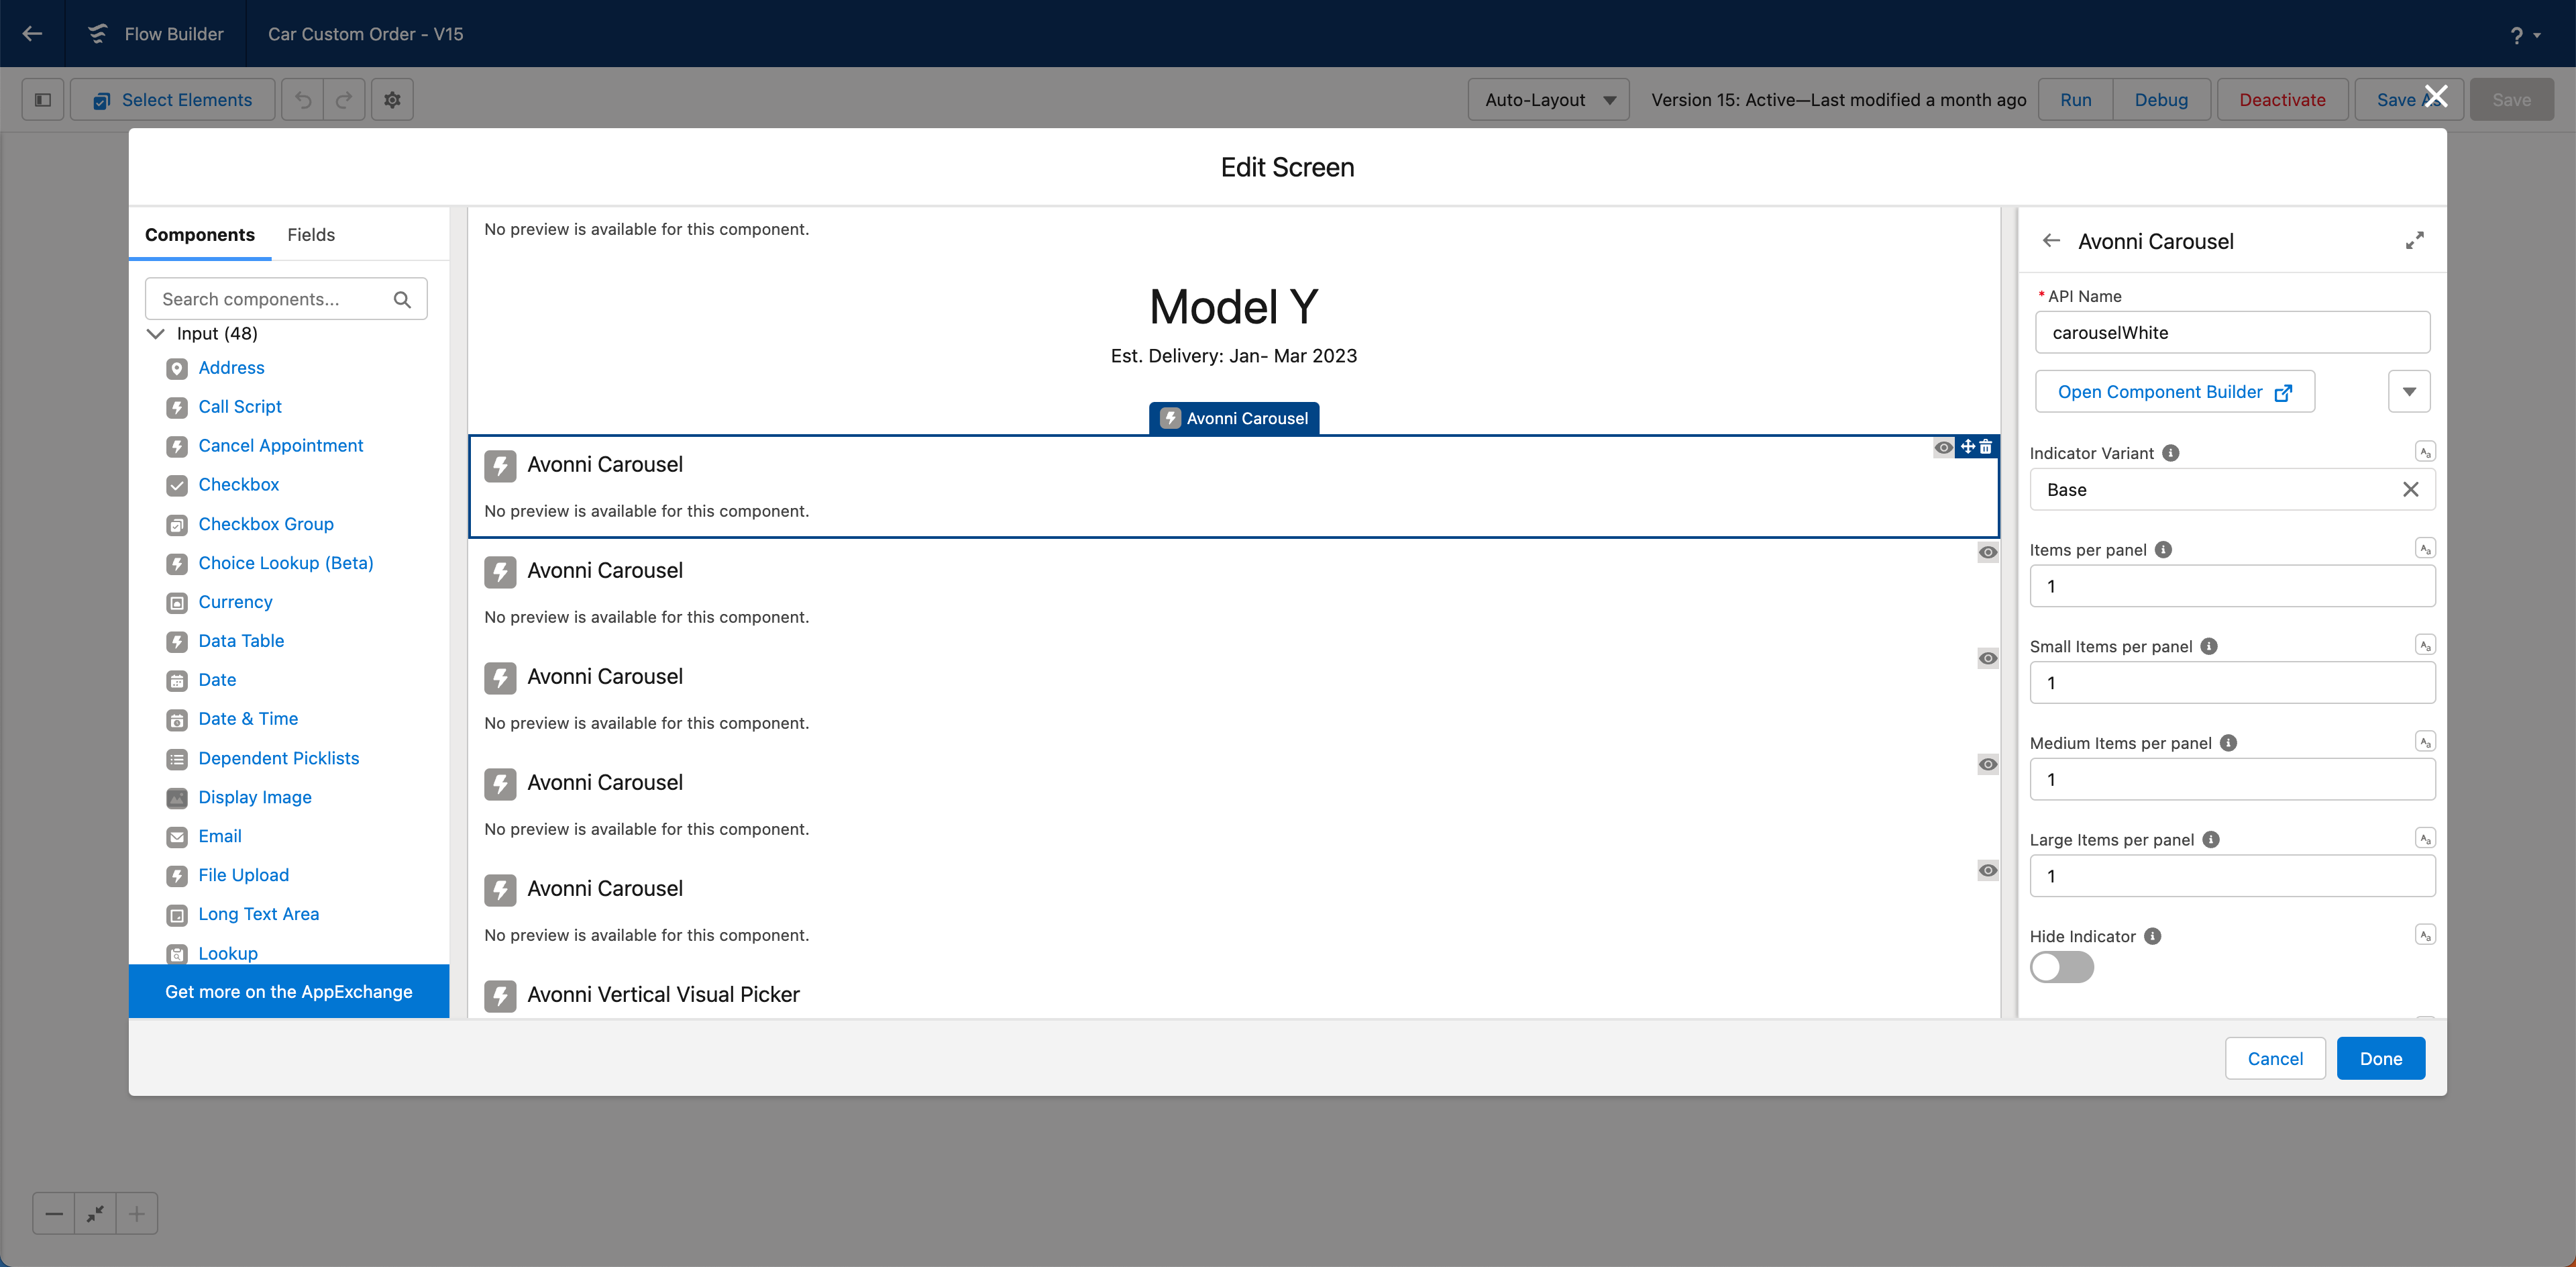
Step 4: Add Avonni Carousel Components for Each Color
Drag and drop an Avonni Carousel component onto the Screen element for each available car color. Configure each Carousel component to display images of the car in the corresponding color.
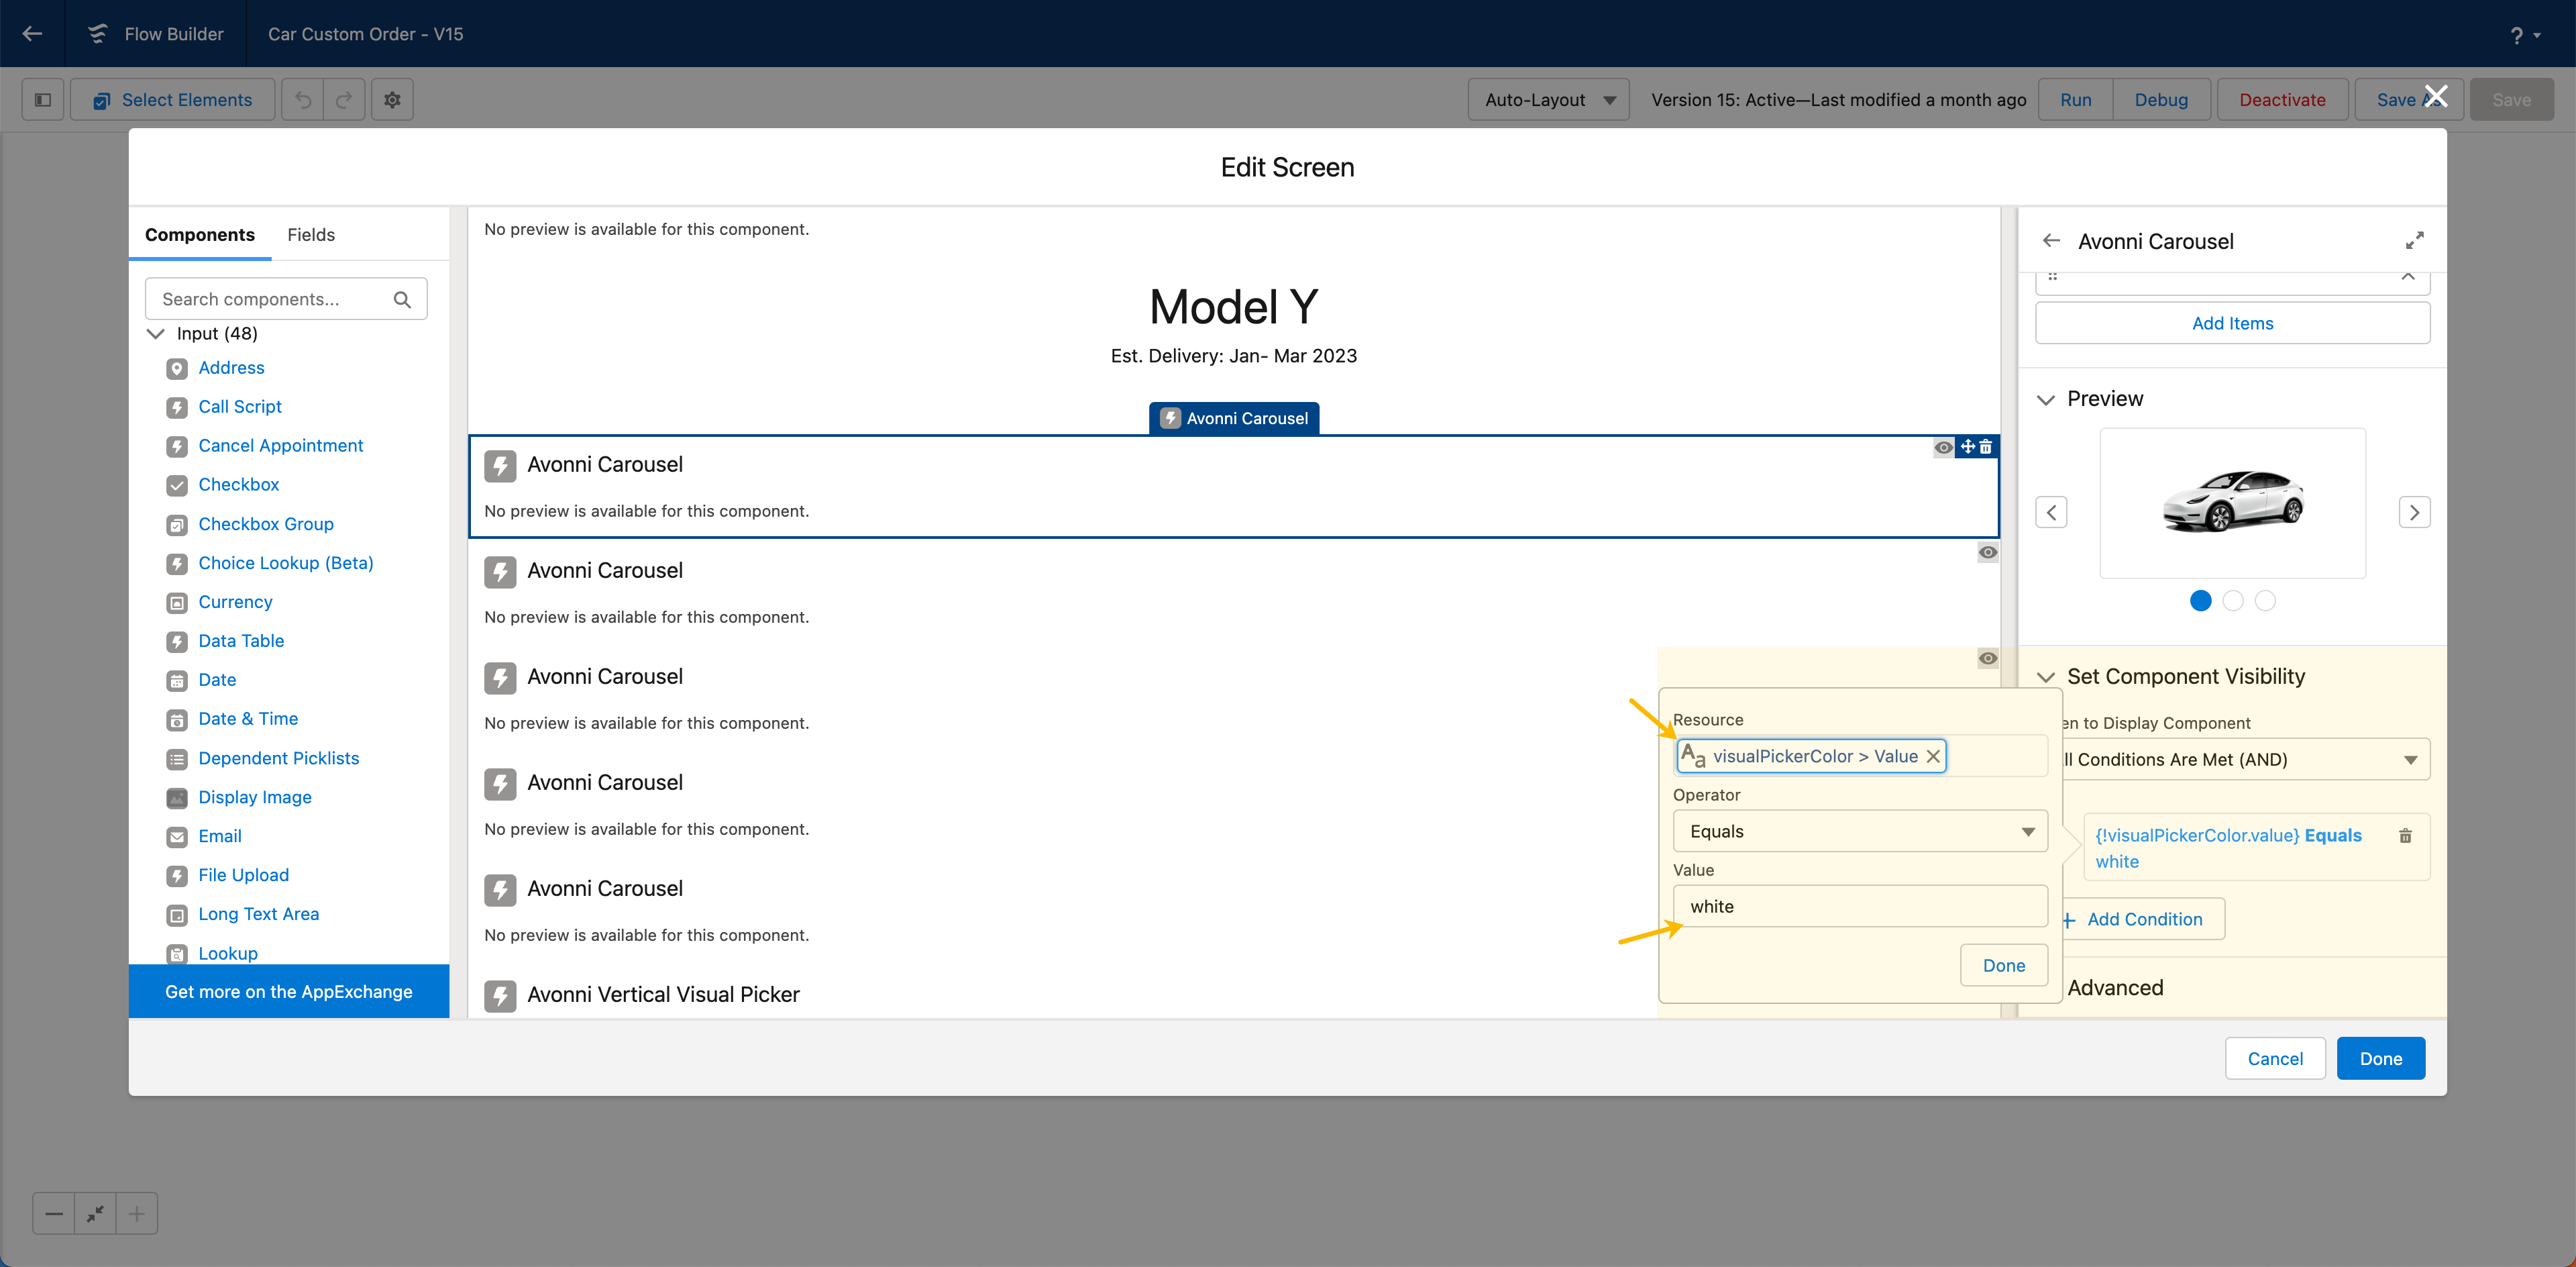
Step 5: Configure Reactivity with the Component Visibility
To display the appropriate Carousel component based on the color selected in the Visual Picker component, follow these steps:
Configure the visibility settings of each Carousel component in the Flow Builder.
Select a Carousel component and locate the "Set Component Visibility" section in the properties panel.
Set the visibility condition to respond to the output of the Visual Picker component: If the Visual Picker output matches the white color, set the corresponding Carousel component's visibility to match the visualPickerColor value white (use the same value as the one assigned to the white carousel).
Repeat this process for all Carousel components.
This will ensure that the Carousel component corresponding to the selected color in the Visual Picker will be displayed.
Step 6: Save and Test the Flow
Save your Flow and test it in the Flow Builder. As you select different colors in the Visual Picker component, the appropriate Carousel component should become visible, displaying car images in the selected color.
By following these steps, you can create a Reactive Component that updates the visibility of the Avonni Carousel components based on the color selected using the Avonni Visual Picker component. This lets users preview a car in their chosen color, creating a more dynamic and interactive user experience.

.gif)


.png)

.png)
.png)
.png)
.png)


.png)


.png)
.png)
.png)
.png)
.png)

.png)
.png)


.png)

.png)
.png)
.png)